****
The
first leg of an Olympic-distance triathlon is a 1.5km (0.9mi) swim.
This thrashing, white-water, washing machine start is often the most
intimidating and off-putting leg of any triathlon. On the bike you can
put your foot down. On the run you can rest. But on the swim? You just
have to make it. The cliche about a triathlon swim is that you can’t win
a race there, but you can lose one. Let the lead pack get too far away,
burn too much energy fighting the water, or simply get caught in a bad
starting position, and the leaders are out of T1 before your feet hit
sand. So how can you have a good, fast 1.5km swim? This advice works
just as well for beginners as it can for experienced triathletes
struggling on their swim, a notoriously weak discipline for most strong
cyclists and runners. Included with most pieces of advice will be a
drill or set to help put the advice to practice.
The key to a faster 1.5km swim can be summed up in Four “S” s- Smooth, Strong, Sustainable, Smart. Each S will be a new blog entry for easy reading.
Smooth
Smooth swimming is fast swimming. The natural reaction of anyone who wants to swim faster is to swim harder.
Harder, in most cases, translates in the water as thrashing, splashing,
and gasping. This only seems harder, and it surely does make it harder
to swim, but it is in no way faster. Great amounts of splashing water in
every direction mean energy is being expended that way and this way and
over there instead of being focused back behind the swimmer where it
should be. A fast swim is a Smooth swim. And a Smooth swim is all about good technique.
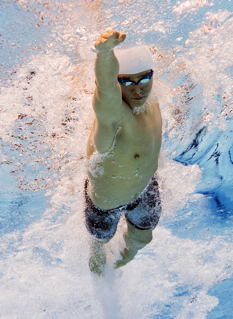
When
a triathlete is thinking about good technique the should not be
thinking so much about Michael Phelps as they should Sun Yang, the 1500m
gold medalist and world record holder from London. This is not to take
away from Phelps, he’s the greatest swimmer in history, but Yang’s
stroke is very different than that of a 200m swimmer, and much more
similar to the stroke of a triathlete.
Before
we really get in to technique tweaks it should be noted that any
technique work needs to be done slowly. It will not work if you are
swimming fast. Changes should be done with a long-term mindset. Don’t
worry if your times raise. That isn’t the point at the start. Times will
fall again as the stroke becomes more comfortable. Technique work
should not be done with pressure and pushing for speed right away makes
any changes disappear. A good stroke is the most important aspect of
swimming fast over distance. That’s why Smooth comes first. It is also going to be the longest section, as I believe it is the most important. You should do at least one Smooth workout a week. Beginning swimmers should do more like one and a half Smooth workouts. Nothing matters if your stroke is rubbish. You will see this information again.
Triathlete technique work comes in four parts- reach, pull, finish, and recovery.
Reach- A
triathlete wants to cover as much distance as possible per stroke
without sacrificing speed to an overlong glide. To lengthen your stroke
you want to reach at the top. Stand up and raise your hand like a
student reluctantly volunteering. Now raise your hand like the kid who knows the answer and needs
to be called on. Oh, oh, Mr. Kotter! Feel what your body did? You
probably rotated and raise that hand as high into the air as you could.
In the water that means rotating your shoulder to your chin and reaching
your fingertips towards to opposite wall, the far buoy, or the swim
exit. Now you’re taller. Now your stroke is 6-8 inches longer than it
was before you reached. 6-8 inches more stroke at the front means you
are traveling farther per stroke. Traveling farther per stroke means
your stroke count drops. A low stroke count means less energy expended
in the water, which means more energy you can use to gap the runners on
the bike.
When
reaching do not let your hips drop. A level body is a fast body. Hips
that drop in the water cause drag. Drag slows you down and makes you
work harder. Imagine swimming downhill. Picture a line across your chest
from shoulder to shoulder. Then picture a line from throat straight
down the midline of your torso. Where those two lines intersect is
called the T-Spot. Lean down on the T-Spot while swimming. Your body is a
seesaw in the water and lowering one end will raise the other.
When
rotating you should be as though on a spit. No side-to-side movement at
all. Imagine a line from the top of your head to inside the tips of
your big toes and you may only rotate on that center line.
That
rotation should be driven from your hips. Much like a boxer can get a
snap on his or her punch with a twist of the torso and a batter can
drive the ball farther by opening up their hips to the pitch, an open
water distance swimmer should be driving their strokes with hip
rotation. Your reach is dictated by the power of your hip twist (to not
quite 90*). You will feel this focus in your obliques.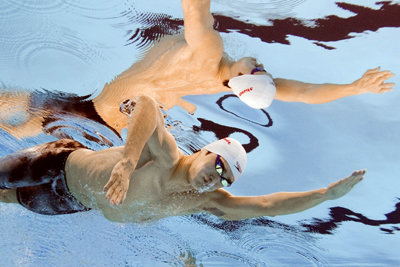
Drills
Stroke Count- Swim 25 yards normally, counting each stroke. One stroke =
front of reach to front of reach with same hand. Begin trying to drop
the count by one or two strokes each 25 be lengthening your reach.
Catch-up
Drill- Swim normally, but do not start the next pull phase until the
previous pull phase is finished. Which means pull, wait for the recovery
to finish, touch the leading hand with the recovering hand, begin the
next pull. You will feel like you are sinking at first. You’ll get
better. Press down on the T-Spot.
Sideline
kick- Lay on your side in the water as though you are mid-stroke. One
are straight out in front, one at your side, shoulders perpendicular to
the pool bottom, head looking down, neck relaxed. Basically, the
position you are in right before the recovery phase of the stroke. Kick
across the pool with short, quick flutter kicks. This isolates the kick,
is better for you than using a kick board, and teaches your body to
balance in the water in the reached position. 5 x 50 of this is enough.
Be sure you are always facing the same wall no matter which direction
you are going so that you work both sides.
Pull-
The pull begins with the catch. Doubling up on the above picture, look
at Yang’s pulling arm. Notice how high his elbow is. The elbow should
always be higher than the hand during the catch phase of a stroke.
Reach. Anchor your hand vertically, grabbing the water. Lever your body
over your hand, digging deeply into the water with your elbow high, thus
allowing you to pull using your whole forearm and hand. Allow your hand
make a small S under the water, but it should not cross your body’s
center line.
The
key to the pull is the high elbow. Many swimmers allow the elbow to
drop, which makes the whole arm slip through the water. Try one of these
visualization techniques:
A) You are climbing through the water. The water is solid and you anchor your hand and pull yourself over your hand as though climbing a wall.
B)
There is a barrel underneath you so your elbow has to be high because
you are wrapping your arm around the barrel, swimming over it.
There
should be force in the pull, do not let yourself slip through the
water. You are grabbing water and pushing it towards your feet. Mr.
Newton says that pushing water behind you will move you in the opposite
direction. Splashing side to side means you are moving laterally rather
than forward, wasting energy. As you pull use your hips to power to
rotation into your reach.
Drill
1,
2, 3, Swim- Swim 100 yards, 4 laps of the pool. The first lap make a
fist and extend only one finger on each hand. This will force you to
grab more water with your forearm. The second lap extend two fingers.
The third lap three. And the fourth lap swim normally, but not you
should be able to really feel all the water that is there to grab.
*Note* Do not allow your hand to wiggle side-to-side in front of you. It will want to. Keep it steady in the water.
Finish-
The pull phase ends with the finish. The finish is where swimmers get
lazy. Your thumb should brush past your hip, extending your triceps.
When swimmers get tired this is the first place the stroke suffers and
swimmers pull their hand straight out of the water at their waist.
Ending the stroke at your waist is a waste! You have ten more inches of
pulling to do at least. This is where the pain starts first, you wear
our the end of the triceps muscle with a good finish. Without locking
your elbow you should contract the muscle fully, flexing it. Those last
few inches of pull are very valuable and will mean serious differences
in times once you are strong enough to maintain a good finish for an
entire swim. And in triathlon, why not? When are you going to use your
upper body again? Might as well wear those muscles out now, when you get
the chance.
Drill
Flick
drill- At the end of every stroke flick water behind you/over your
butt. Focus on getting a decent splash towards your feet. Then you will
know you’re finishing hard. This over-emphasis on the movement will
translate into better regular finishing.
Thumb
To Thigh- Stand up, let your arms fall to your side, extend your
thumbs into your thighs. Every stroke try to whack your thumb against
your thigh. Try and leave a bruise in the same spot every time. Then you
are finishing far enough down and you are finishing hard.
Recovery-
The recovery phase of freestyle begins at the finish and ends at the
reach. Your goal is to be controlled. Don’t simply flop your arms
forward. Too much splashing is slow and ugly. Swimming should be smooth
and pretty. Lift your arm from the elbow, allowing the bottom half of
your arm to be relaxed. Breathing takes place from the finish to when
your arm crosses just past your head. The hand enters the water a few
degrees past your head and you begin the rotation/reach.
Drills
Thumb
Drag- Plant your thumb in your thigh at the finish and drag it up your
body to your armpit during the recovery. This will force you to keep
your elbow high.
Fingertip
Drag/Piano- This is the same concept as the Thumb Drag. Let the tips of
your fingers graze the surface of the water during recovery, lightly as
though you were playing piano.
*Notes*
Breathing should take place half underwater, half above water. be sure
you are blowing bubbles so that when you turn your head all you are
doing is inhaling. No reason to turn and exhale inhale. You do not need a
lungful of air, you only need enough to get to the next breath two or
three strokes away. I will detail a breathing drill in the Sustainable
section. When breathing do not pull your head out of the water. Your
head floats, allow it to float. When you need to breathe simply turn
your head with your body until half your face breaks the surface. No
need to look left or right. Breathe with the natural motion of the
stroke.
There
was not much mention of kicking in this section. Your kick should be
smooth and regular, but not hard. Kicking will be detailed more in the Smart section.
*General Notes*
All of these drills can be included in the workouts in the other sections, especially the Sustainability section. They will not work as well in the Strong sets because the goals for Strong are different. Examples will be given.
Technique will be the biggest difference maker
in your times, especially if you are a beginning swimmer. You can’t
muscle your way through 1650yds. You must fix your stroke first. Fast is
not a worry until Smooth is taken care of. Smooth
is never completely fixed, there are always small things to fix, but
you’ve got to move the big rocks before worrying about speed.
This bit of advice has been the thing that has helped me improve the most. I love this post.
ReplyDelete